Creating My Performance And Character Showreel

Today I brought together all of my Performance and Character animations and created a showreel for the module with them. I had a structured system with a title and end card which explained to the audience what this video was. I also included smaller title cards before every animation explaining what task they were going to see next. I added the animations in 3x each to allow for anyone watching to study them and not have to keep going back if they wanted to watch one over again. I also included the University Of Salford graphic which went over the screen. This allowed me to watermark my work and also show that it was for my university. The graphic also contained a framerate counter and a mini subheading which I was able to put the name of the animation which the audience were watching in case they forgot. I added a white background throughout the whole video and also included a soft backing track to improve the overall feel of the module showreel. You can find my exported showreel below!

ttt.PNG

Overall I found this quite an easy task to accomplish, I have had quite a lot of experience now in using Adobe Premiere so I knew how to add everything I wanted to easily and also how to move all my work around accordingly to how I wanted it to be. With this done I have hopefully finished the Performance And Character module, unless there is more work that needs doing that the lecturers tell me about!

Editing My Short Story Animation

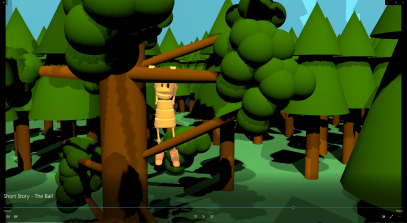
Today I went onto editing together the different sections for my short story. I only had scenes so there wasn’t too much to be done. I decided to have a title and end card on the animation so I used a white background and added them in with a name for the animation which I called The Ball. I added some basic sound effects to the animation such as birds as a backing track, a dog bark for the distraction, bounces for the ball and a scream for when Buckid fell out of the tree. With all this edited together I had video transitions also to allow for a smoother change between scenes which worked pretty well. I watched it back and changed the sequence setting so that my animation would be in the resolution of 1920 x 1080. With this all done I was ready to export and upload, unfortunately I wasn’t able to record my creation of this part. The Ball short story can be found below!

tt.PNG

Overall I found this animation task to be very good I thought it was going to be tricky but once I had a full idea it wasn’t as difficult as I had expected it to be. The good parts about my performance was that I was able to build a small world for my characters to act around in along with testing out my dog rig which I downloaded a while ago. With the brief being whatever you wanted to do I got a lot of freedom messing around and testing the rigs in my animation to create a story. What didn’t go well was that I still haven’t figured lighting out fully so some of the objects have pixel shadows which doesn’t look to good. This is an easy fix though and it just requires more time spent on researching how the lighting works in maya. With this open story brief it allowed me to show my creativity through my work instead of jsut through the specific animations which were required of me to do, with this it tests all of my abilities with animating which I have learnt up until now and it puts them all to test in one animation which I found out to be very useful and helpful. For things which I could have done would have been to consider timings more often and the pauses between each scenes and holds. The way I did it works but if I had considered them a little bit more it would have allowed for a much smoother animation overall and it would have enabled the audience to understand everything which was happening better as well. If this arose again I would make sure to plan out everything and have an extrememly easy and interactive story for the audience to understand and have a connection with my characters. With this I could create a much better animation than just having my characters doing basic things and not having much interaction with the audience, this could be set up with specific camera angles.

Finally my animation consisted of Buckid throwing a ball against a fence in his back garden. This was making some noise and disturbing the peaceful surroundings. The dog next door barks and startles Buckid causing him to throw the ball too hard. The ball then lands in a tree and Buckid struts over to a hole in the fence to go and retrieve it. Then we see Buckid staring up at the tree and looking at how tall it is, he walks over to it and tests to see if the branchest are strong enough to support his own weight. When tested he starts to climb, then the scene cuts and you see him at the top of the tree shaking. He reaches to grab the branch which the ball landed on but doesn’t have good enough ballance and falls with a scream to a lower branch. The tension from his weight on the other branch causes the ball to fly out of the tree straight into the dogs mouth who was waiting in the neighbours garden. The dog takes the ball into his doghouse and drops it into a huge pile of balls showing the audience that this sort of thing happens all the time to these two characters. Then it cuts back to Buckid shaking his head in rage because he has failed to get his ball again.


Short Story Scene 3

Today I started the production of my scene 3 for my story. This brought me onto my sixth stage for the whole animation. In this section all I managed to animate was what happened to Buckid and the ball in the tree. I had Buckid perched on his branch at the top attempting to get the ball. He made a mistake and slipped causing him to fall to a lower branch. With his weight on the first branch it caused it to spring up and the ball went flying into the garden with the dog. You can see me creating this scene below.

Capture.PNG

My ideas for the next little bit is that I will have the dog catch the ball and walk into his doghouse. Inside his doghouse however will be a lot of other balls showing the audience that this sort of thing has happened before to poor Buckid. I will have to create the dog house and a short animation for the dog to do while he takes the ball to his little house.

I came back to the animation a few hours later and carried out my final adjustments to the end part. I added everything which I wanted too and animated the dog and the doghouse accordingly to my plans. With this done I set up the camera and the lighting in the scene so that everything was viewed how I wanted it to be and also my chosen objects were lit up evenly with the timings I had chose. With this part done I had completed scene 3. Unfortunately I didn’t manage to capture my screen for the creation of this section of animation.

Working On My Short Story

Today I started to produce my second scene for my short story. This scene consisted of Buckid looking up at the tree where his ball landed. He then walks over to the tree and starts to test the branches to see if they will hold his weight. Following this he starts to get his footing on the tree and hoist himself up. This is shot from a different angle than the first scene because I wanted to include the second character again which was the dog. I had the camera zoom past the dog and focus on Buckid, this allowed me to include them both efficiently. The only issue is that it might confuse the audience when the camera switches over between scenes. I had an issue with Maya crashing again which was annoying but I managed to get back to the point where progress was lost and carried on like normal. This scene was shorter than the first and a lot easier to do, it was mainly a joining scene for the audience to have which allowed them to understand what will happen next. The video to me creating this scene can be found below!

Capture

Feedback On Improving Short Story

The other day I attended a lecture where I got feedback on my short story idea and progress. I showed a member of staff what I had in mind and also a preview of the first scene. The response I got helped my loads because it notified me with enough time to change and add to my work appropriately in order to get a good grade overall. The issue with my first idea was that there was no conflict or reason to why my character was doing this. What I thought about then was to add another character to my animation and how to implement it. I decided on having an actual dog rig in my animation because of the dog bark which I wanted to use and also because I already had a dog rig downloaded from a previous test.

I quickly updated my first scene by adding a small hole in the fence and having a dog peaking through it and barking. This allowed more visuals in the end for the audience to look at and also an idea to where the bark came from. This was all placed according to what I had set up before with Buckid looking over his shoulder to see where the noise came from. With this added I playblaster/exported the animation again and finished off my first scene. Unfortunately I didnt screen capture any of this specific progress through my animation!

My Learning Materials And Extra Research For Animation Tasks

Throughout this module I have been given a lot of helpful clips and information to watch and read to improve my knowledge on acting in animations. Most of these were given to me over blackboard but I have gone out, found and understood many different animations which apply their own principles to this.

Firstly I was given a short article to read, this article was all about what acting actually is and what makes a good actor. It was an extremely interesting article and gave me a great insight into the methods of acting. The website is linked underneath.

help 0.PNG

Along the lines of the article I was shown a multiple of different videos of people explaining their own opinions on the term acting and teaching others what it really means. I have watched through these and they have been very helpful for me before my first animations involving this. I have a few good clips which were given to me that I watch which are linked underneath this.

help 2                              help 1

Along with these clips there was a short video explaining how to fix floating animations and ways to include gravity and weight to the characters. This opened me up to issues which I didn’t think about previously and also allowed me to work on them effectively. The video is linked underneath.

help 3.PNG

Continuing my learning before I started my animations there were examples that I found of other peoples works and also different professional examples of how it has been completed in the past. Some of these can be used as great references for my own animations but they are good to watch and understand how each person portrays life and action into their characters. Along with this I have got a interview which is all about the theme of acting. I have linked a multiple of these underneath.

help 8             help 7             help 6help 5                                                                        help 4

Following these I had completed my first expression walks using the information which I learnt from my learning materials a lot of them gave me great reference for different and unique ways in which I could animate these walks. I feel as though they are a lot better from watching these examples and doing the sufficient research to learn well.

I was shown more videos of past examples of acting with animations and real life. There were great reference videos for different expression walks which I could use for future animations. There was also other videos showing these used in animations and how they have been portrayed well. They are linked underneath.

help 12     help 11

help 10    help 9

These led onto the stage of my carrying out my body mechanics animation. From what I had watched so far they have showing different uses of body mechanics in many of different ways through a multiple of characters. I feel as if I use some of these and also take note of who and why my character is going what they are doing it will make a successful animation.

Along animating for my body mechanics animation I got given and found more learning materials which will help me through my animations. These consisted of interviews with previous successful artists with acting and also other animated examples, these are linked underneath.

help 18                              help 17help 16                              help 15help 14                              help 13

With these clips they showed a lot of dialogue performance with the use of acting and sound in comparison to what is going on on the screen. With these clips watched and mind open to viewing and looking at more examples I was ready to move onto the next animation task of dialogue performance.

For this I found other useful clips and videos which will help me create a successful animation. These range from previous examples to more body mechanics and tips to helping me produce good and successful work. A funny clip which is included below is of an orangutan trying to get attention towards him from his friends. It is a very good video because with them being so related to us it is like an animated character doing their over the top movements and actions. I have linked these underneath as well.

help 24                   help 23help 22                   help 21help 20                   help 19

Following all of these examples this was the end of help provided on blackboard. I had already done a lot of research myself into the learning of this module and good examples that I could carry over into my own animations. At home I am continuing to watch animated films and TV shows which include all of what I need to improve the way I portray acting. With all this learning I am collecting I am hopefully getting better at animating and portraying action successfully into my animations. I am going to continue me research and learning. This will help me greatly when creating my short story animation because of all the examples I have previously seen and took in to improve my animation practice.
Starting The Short Story Animation

Today I started the production on my short story animation, I made a mini schedule to my first initial hopes and plan for how long it was going to take and what I was going to do for this week. For today I was supposed to complete the environment building and then start to animate the first scene of the animation. Tomorrow would be finishing off the first stage and starting to animate the second. And Thursday would be to finish off the second stage. This was all I got up to for my schedule but when starting to create the environment I had some changes to the story in my mind as to what I could do and it would increase the production time overall.

While world building I found out that it was going to take longer than I thought it would, and I kept coming up with new ideas which I could add to the environment to make a better animation and allow for a better backstory for my character. My world consisted of Buckid standing in his back garden in a little neighbourhood on a sunny day. There is a forest behind his house and a little hole in the fence. With the world building finished I added a natural stance for Buckid to stand in and that finalized my first stage of production which you can find recorded under!

story s1 cre 1

With this original scene done I can copy it over and allow for the other scenes to use all the basic props but just include updated sections if needed for the story-line. I also added lighting in to the scene to enable the use of shadows. I found this difficult to set up but eventually found one that suited. I had to use 2 lights but they cast shadow and because there were two they enabled some objects to have different colourings on them which made it look like I put a simple cartoon texture on some things.

I came back to this animation a few hours later to start stage 2. This stage was only short and it was to focus on getting the throw and catch correct. It spend me a while to get a believable action but once done I was able to copy it over and allow for a loop and the ball to be thrown a multiple of times before the error came into play. I had to set the ball key-frames individually to stay with the hand and get rid of the float effect and allow a more realistic feel to it. I ran into a small issue with looping when the arms tried going back to normal. This issue made Buckids arm spin in a mini circle, I couldn’t figure out how to fix this so I disguised it a little and sort of made it look like part of the animation between the catches. When I get the chance I will go and speak to one of my lecturers and hope they have a quick fix for this in which I can do. You can find the video of this stage under!

story s1 cre 2

The following day I came back to this animation with a fresh mind and watched it over to see if there was anything that needed a quick fix. What I discovered was that the actions which I had made had no relevance to what was going to happen next, so I needed to create a cause. My first idea was to have Buckid throw the ball harder and that was the reason to why it bounced differently. After creating this I saw that it needed something else. Then I remembered that I could include dialogue and because I was in a neighbourhood I decided to have a dog bark as he threw the ball in order to startle him and throw it differently. I couldn’t upload the sound file into the animation for some reason so I had to do that in post in Adobe Premiere but I found the perfect sound clip for it. I also changed the balls speed at points and followed on with its path into the tree. I added some other details to this part by having the trees branch and leaves shake when the ball landed in it to show the weight effectively which looked good in the end. Unfortunately I was unable to record this stage so I have no video of its creation.

The next stage was focused on getting Buckids other body movements right so he didn’t look like a robot. I added subtle movement to his body in order to flow nicely with the throws. Another thing I did was consider what cameras I was wanting to add so I added some facial expressions to Buckid as sort of his reactions to what was going on around him. With this part done I went on to the final part of this scene, I had Buckid walking over to the hole in the fence then start to crawl through it. So far I only managed to get the basic movements involved and not have any detailing really. But from the timings and what I have done so far I think it will look good once detailing has been added to that part. You can see the creation of this stage under!

story s1 cre 3

I carried on with the first scene with hopes to finish it tonight. I managed to develop the walk and add details into it and also the crawl. Unfortunately Maya crashed and I lost it all, but with my knowledge and the matter of just doing it I caught up to where I was again quickly and carried on developing my animation. I finished the walk and the crawl to a nice standard and then all that I had left to do was to set up my camera in its correct places. With my camera I had a few cuts and moves around with it to get the best action shot for this scene for which I could do. These shots showed the actions and allowed you to connect with the character more as well. After doing the shots and turning the lighting I had set up back on I noticed an error with it. My lighting was projecting shadows wrongly onto the backdrop. I had a quick fix for this and I was able to get rid of those unwanted shadows by removing some lights and replacing them with others. After looking through the animation again and exporting it into a good quality video it brought me to the end of the 1st scene. You can see the video of me creating this scene under!

story s1 cre 4

Review Day And Short Story Ideas

Today I attended a lecture in which we had a review session. I got a lot of effective and helpful feedback from the class and teachers which would benefit me and make my animation look better. The first few things were eye level and weight. These things when considering will allow the audience to watch the animation in a nicer way by connecting more with the character and also having the character give of a more realistic feel thean robotic. Another thing which I was notified about is the horizon and including more snaps with my animations. These can be done with key poses and allowing breathing time and pauses. The horizon is important because it allows the audience to see where the character is actually standing and what proportion they are to everything else too. I also got notified about timings and involving multiple scenes. These would give the dialogue performance a stronger more realistic feel if Buckid acts in time with what is going on in the audio. With the multiple scenes it will allow me to control my animation more and also allow more freedom with what I am animating overall. The last few things were the body breaks, feet sliding and rotation points. These were easily fixable by changing rotation points for Buckid so his body parts didn’t bend out of their natural positions. With the feet sliding all I had to do was to make sure the key-frames were placed accordingly and none of them moved when not needed to.  The final thing was over gesturing which was down to including more movements, this overrun the character and messed up with timings as well. The realism was distorted too because usually people don’t move and act out every word which is being said. I can also improve my animations by including shadows. This will help visually and also allow the audience to understand height and which way the body is moving for a more effective view on my whole animation.

I also learnt about our final task on this module of Performance and Character which was a short story. I had some quick brainstorms for what would involve what I have previously done and thought up an idea which is do-able and covers a bunch of the animation practices. My idea consisted of Buckid throwing a ball at a wall until it gets stuck in a tree. With him being annoyed he struts over to the tree and the scene ends. This first scene covers ball bouncing, throwing and stylized walks. The next scene consists of him looking up at the tree and starting to climb to get to the ball. This scene shows climbing. The next scene consists of Buckid reaching the ball and picking it up, throwing it out the tree then accidentally slipping and falling out the tree. This scene will show picking up. The next scene will consist of Buckid falling and landing on the floor which I will include dialogue until he hits the floor and the ball bounces on his head and he looks up in shock. With this idea I think I will be able to have a good attempt at it and it will create a nice short story that covers what I have learnt from this module through animation.

Filling In The Dialogue Performance Gaps

Today I revisited my dialogue performance animation and started to fill in the gaps. I spent a short time filling in key details just for Maya to crash and I had to start over. On the start over I remembered to save often. I noticed that my key-frames were out of place because when setting out the key poses I had the frame counter at 24fps instead of 25fps. I had to go into the graph editor and fix all of these and align them up properly again. After this I was ready to animate, I had problems with the rotation key-frames because I had set them up previously to default back to 0. This meant Buckid kept glitching out and not moving properly. I again fixed all of this by rotating his body parts past 360 and setting the key-frames ahead so they didn’t get back to zero. I also polished up the first movements up to about half way and added some anticipation. You can see the video of me creating this stage under!

dial cre 1

I also had another go at filling in some gaps this time around I had made it a lot easier for myself. I went back and cleaned up parts in which I hadn’t noticed needed doing before along with adding some cleaner movements over the middle of the animation. Another thing in which I did was to go through the rest of the important key-frames up-to the end and set the rotation points correctly beforehand so that when I reach that point I have less work to do and also I wont get confused with random body parts moving out of place. The video of me creating this stage can be found under!

dial cre 2

The following day I came back to this animation with a clear mind and carried on with polishing off my work. I went through the beginning again tackling any issues which I saw and anything which I could improve on. Following this I started finalizing the last few seconds of the animation by correcting Buckids movements. I had to reassign some of the key-frames so that he doesn’t flip out randomly which took a while. Once done I went through and adjusted timings and realism through the graph editor. This took me to the end of the animation. During these tasks I have started to use the graph editor a lot more and it has allowed me to pick up more skills and get my animations to a better standard overall. The video to me creating this part can be found under!

dial cre 3

Overall I found this task to be quite tricky, when first tackling it I though it would be quite simple but when animating I didn’t realize how hard the timings and syncing with the audio track would be. I decided to animate Buckid to the first audio track of what I depicted it as someone showing off their Kung-Fu. I had Buckid doing his fancy moves and looking quite insane but having him fail at the end, I did all this as best as I could in-time with the audio. What went well for me was that I attempted new movements with the rig which I had never touched on or probably never would have touched on if not chosen that specific sound track. What I think was bad about the experience was that the audio track I chose didn’t have much talking in it so I didn’t portray Buckid very well in that aspect but only through the noises he made. It was an effective task which had overall improved my skills on timings within Maya while animating. If I have more time I will go back through the animation and perfect the movements to allow smoother transitions along with the sound to have it matching seamlessly and flowing nicely. I could even reattempt this whole animation with a different sound file to see how I get on if I have the time towards it. If this plan arose again I would make sure to include all waiting times within my key pose setups so when I go to animating it will allow me to have a much easier experience than doing it with everything already in place and then needing to create the space therefore disrupting the whole animation. But overall I enjoyed the dialogue performance animation task.

The video for my dialogue performance animation can be found under!

dial


Key Posing My Dialogue Performance

Today I started my production on my key posing for dialogue performance animation. I had listened to the different 11 second clips carefully I made the decision of choosing the 1st clip which involved someone showing off their karate. I started my implementing the sound onto Maya by going to the Windows tab, then to Animation Editors, then to Trax Editor, from there I went to File then Import Audio. After bringing in the audio file I was able to track it on the timeline and decide when I wanted to have Buckid acting out his specific poses. I chose these poses to be quite extreme and involve him moving around a lot and showing off. This would emphasis the point of him doing karate and allow for a more effective dialogue performance. The video for me creating this can be found under!

dial key 1

Following on I completed the second half of key posing and decided to add some stronger poses and actions into this. I added holds too which were used to emphasis the movements which Buckid was doing. After finishing the key poses I then went through the animation and screenshot each key pose in order to bring them into an animatic. This was to give me and any audience an idea to what my animation will look like in-time with the soundtrack. The video for me creating this can be found under!

dial key 2

Next I brought the soundtrack and all the key-frame images into Adobe Premiere and started to create my animatic. I had to time them exactly to how I wanted them to be placed with the soundtrack. I did this effectively and managed to get all the timings right. When watching it back though I noticed that there were some moments when things happened to quickly or too slowly. To fix this I decided to remove one of the actions from earlier on and place it somewhere near the end in time with the audio so that the cluster at the start was cleared and it allowed for a more human movements from Buckid. I think when I go and fill in the gaps for this animation and make it run smoothly there will be a few bits I may need to change to create a nice timing throughout but other than that the Animatic looked pretty good put together. The video for me creating this can be found under!

dial anim cre

The video for my Animatic can be found under!

dial anim